Technique
Although this site is meant to help you create a painting using acrylic paint and
plasticine, paint features very little in what is to follow. I cannot advise you about
the use of colour - apart from in the initial stages, where it is used in broad areas of
wash and background. The main topic of my writing concerns the handling of the
plasticine and how to build up textures – flat or raised –for the subject of your
painting.
I use acrylic paint as it is less messy than oils.
When applying the paint, it is important to note that it dries slightly darker than
when actually applied, so it is advisable to mix your colours to a lighter shade, if
you want them to be as realistic as possible.
I use canvas boards rather than stretched canvases, as sometimes the plasticine
needs a lot of pressure to make it stick to the board. I work on the floor at the
beginning of any painting, as this provides a firm grounding on which to work,
before moving on to a table easel and/or a free-standing easel.
Although you might not like to work on a bare canvas, it is better to do so, in order
that you can sketch out your “design” and then put on a background colour mix
(usually the sky, when painting a landscape). You can cover the whole board using
this, as it will “hold” the initial plasticine sketch and then be covered later when you
add larger amounts of plasticine. It’s a good idea to leave some parts of this sky
colour untouched if you want it to represent a river, lake or puddle etc.
It is only when you get down to adding texture to the subject and then to the mental
and physical mixing of your colours, that it gets harder, especially the paint mixing.
At that point – if you have no sight at all – it is then that you need someone you can
trust implicitly who will try to mix the colours you want, the colours you remember
or those that you can see in your mind – or all of these.
The illustration here shows the use of a matchstick to scratch in the texture of a
tree bark.
I have found that the best plasticine to use is Newplast, which is made and sold by
Newclay Products Limited. It’s supplied in nine inch 500g blocks, comprising
several layers of single lengths which, where necessary, can be used as tree trunks,
railings or gate slats, etc.
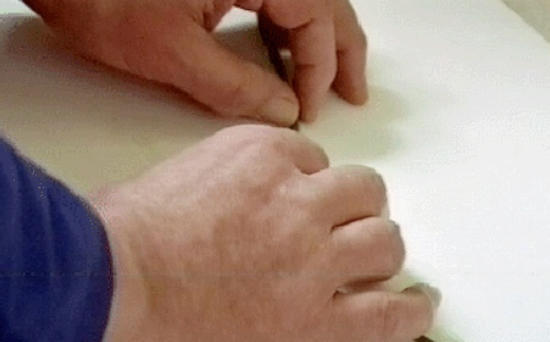
In this picture I’m plaiting three strands of plasticine to make a tree. When the
trunk is made, I can then splay out the strands to represent branches.
It is best to use an appropriate colour for the textured areas you are making, i.e.
brown plasticine for trees and foliage, green for grass and foliage, grey for stone
walls, etc. Never use white unless you are working on a snow scene, for the paint
will only cover the top and side of the plasticine – it does not seep into it. For
example, if you paint something and you’re not satisfied with its position and then
move it (using white plasticine) the white will show through and you won’t know
unless someone tells you – and it might be too late by then. Of course, conversely,
this may produce an interesting effect to your painting – the choice is yours.
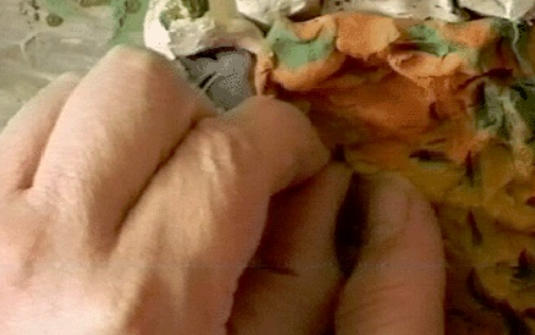
In this image, I’m pinching plasticine to produce the texture of grass and leaves.
The plasticine colours I’ve mentioned are based upon my own experience as a
representational artist, trying to match up wherever I can. But you may use any
colour you like; it is, after all, your painting.
So, where to start?
When using a landscape as the main subject, there is usually more green than any
other colour. So begin by rolling out a thin line of green plasticine to draw the
outline of the painting.
Once you are satisfied with your outline, you then apply either a thin wash of colour
to fix the plasticine to the board – any colour will do, as it will be over-painted later,
but it is preferable to use a colour which will feature in your painting and so would
not matter if it showed through – or you can use the overall sky colour as
mentioned above.
As a rule, it is always best to work from the background inwards, so it would be
better if you put the sky colour on first. Ask for help to check that your sky hasn’t
got any bobbles or any other unsightly marks in it, as it can be very frustrating to
find out that, after all your work on the sky, there are foreign bodies spoiling the
surface.
You can now begin to add more substance to your painting, by using larger
amounts of plasticine on your canvas. Start anywhere you like, but put in the
ground areas such as grassland, paths or tracks first and build upon these later.
Grass, for example, is made by flattening out a large and thickish area of green
plasticine, laying it where required and then texturing it with your fingers into level
or uneven ground. The farther away the impression you want to achieve re
perspective, the flatter and smoother the texture of the plasticine should be. The
foreground and middle distance can be worked on with as much texture as you
think necessary, e.g. pinching and scrunching the plasticine to give the effect of
grass and fallen leaves or rough surfaces of woodland tracks. The latter can be
created by scraping out plasticine from the grass area or shoving it sideways to
make a track and the residue to make the verges.
Once you are satisfied with your ground work, you can then start to add, for
example, trees and stone walls. A tree can be as simple as using a single strand of
plasticine or for the benefit of perspective, you can intertwine several strands to
make a stouter or ‘in your face’ tree.
The foliage is just scrunched up plasticine and you add it to your basic looking
branches as you think is realistic – and also to hide the lack of actual branches. I
once tried to create a tree with bare branches in the painting First Snow, but it
didn’t look convincing and the tiny boughs were difficult to apply, so it is better to
make only trees in full foliage.
For stone walls, all you need (depending on the size of your walls) are squarish
pieces of plasticine, which you can make into rough stone shapes and place them
where necessary. In the building of your wall, leave holes and spaces, dislodge
some stones and put others in irregular positions, so that the wall looks weather-
beaten.
I like to keep the designs of my paintings simple, leaving more room for expression
in the working of the plasticine and paint. Usually, in my landscapes, I avoid
creating any kinds of buildings, as to do so would involve too many horizontals and
verticals and, with all those lines, it is easy to become confused. However, in one of
my paintings, Moon’s Tune, I have added the rudimentary aspect of a cottage, but
this was more to fill up a space I wasn’t sure about, rather than to try and actually
create a building. A log cabin though could be simple enough to construct, using
single strands of plasticine, but I associate log cabins with the USA and as I have
never been there, my paintings try to evoke the countryside of the UK – but that’s
not to say don’t try it!
So, that’s about it for applying and working with the plasticine. Now it’s on to the
painting – and that is up to you!
<<< BACK TO MAIN ‘ART’ PAGE


